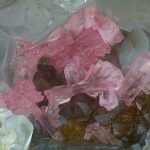
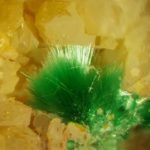
The tiny world of micro-minerals is all about perfection. Micro crystals can be perfectly formed and transparent unlike their macro crystal relations. As crystals grow there are often inclusions and impurities which can lead to misshapen and opaque crystals. Viewing micro crystals is a challenge as is photographing them. Collecting micro minerals has the advantage of small space requirements and generally cheap specimen prices unless you become a collector of rare minerals. The disadvantage is you need some good equipment.
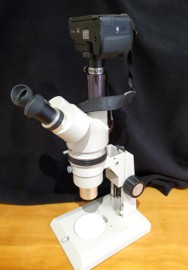
I would recommend a good zoom microscope with a magnification range about 6-40 times. Higher magnification is available but the depth of field becomes so shallow that in my opinion it is of little benefit. For higher magnifications a bellows setup would be better. I have a Nikon SMZ-10 trinocular microscope that I bought used off E-Bay and I like it very much. I tried a cheap microscope and the optics were terrible and returned it. I have adapted my Digital SLR camera to fit on the trinocular.
Nikon SMZ-10 trinocular microscope
The next thing you need is a good light. I use a fibre optic dual gooseneck light. You want a cool light source as some minerals are negatively impacted by heat. I have not tried the LED ring lights that mount on the microscope. For photography it might be better to have some shadows for a better 3 dimensional image.
Fibre optic dual gooseneck light
Mounting Specimens
Micro mounters can be very particular about presentation and scorn people, such as myself, that use mineral tack to hold a specimen in a micro box. True micro mounters prefer the specimens to be permanently mounted and often glue the specimen on pegs.
Photographing Specimens
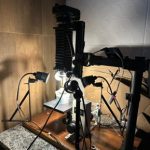
To get good photographs of micro-minerals it is essential to use photo stacking since the depth of field rapidly diminishes with magnification. Using photo stacking will result in a better image than viewing through the microscope and focusing up and down to see the specimen. Ideally when taking a series of photographs having a micrometer on the stage will give the best results. I do not have one but try to move the knob equal increments.
Once you have a stack of photos then you need to stitch them together using software. Amateurs, such as myself, use free software such as CombineZP.
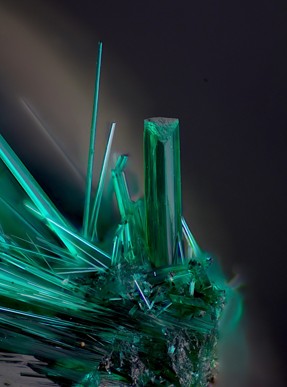
The following photograph of Brochantite was stacked using a bellows set up by Jhonatan Gomez.
The Field of view is 2mm!
Brochantite - Igarape-Bahia mine, Para FOV 2mm
Brochantite: Igarape-Bahia mine, Para FOV 2mm
Cornetite: D.R. Congo FOV 3mm
Gahnite on spessartine: Carnauba dos Dantas, Brasil, FOV 2mm
Talmesite: Aghbar, Morrocco FOV 2mm
Chalcopyrite on Sphalerite on Dolomite: Mina Troya, Mutiloa, Spain